This project is still alive!

November 6, 2014

IMG_6341

I swear I’m still at work on it. Just haven’t posted here in a while. 2 years I guess!! I should post a dump of some photos of the project over the last to years to get caught up. Currently I’m battling the Canopy frame alignment which seems to be par for the course for -7 tip up builders.

Picking It Back Up

November 26, 2012

Well the airplane factory is back up and running after an extended hiatus. I actually took August and September completely off for a family vacation and being outdoors in the NW Sunshine as much as possible. In October after persuading the spiders to move out of the garage, I finished some small tasks on the fuse. I mounted the outside mount for the fuel line cover on the front spar and finished prepping the fuel tank to fuse mount. I spent a weekend taking the EAA Electrical workshop. That was very helpful to start understanding the basics of aircraft electrical systems and methods.

In November I was able to get rudder cable install started, drill the holes for the static air probes and squeeze more rivets at the 705/longeron intersections. The turkey day holiday has given me time to concentrate on building the canopy frame.

With my new momentum I’m hoping to knock out the canopy frame and temp the forward deck together in the next month. Then it’ll be time to paint the inside cabin with its final color!

20121125-190110.jpg

20121125-190233.jpg

Fuel Pump Cover and Misc.

June 24, 2012

The boys were wiped out and asleep before 9pm thanks to three birthday parties in one day. I celebrated by heading into the shop.

Kurious Oranj is going to be fuel injected. This requires me to stray from the plans a bit to fit the larger electric fuel pump required to pressurize the fuel system. Luckily, this is a common mod. so there’s a number of builder references as well as a optional cover kit from Vans. I settled on the EFii fuel pump. It along with the Vans fuel pump cover pieces arrived last week.

Tonight, I fit the cover together and drilled it to the existing center cover pieces. I’ll need to do a little more drilling and fabricate some brackets to span the center cover in order to mount the fuel pump securely.

Additionally, I prepped all the remaining cabin parts. I now have a big pile of parts to wash/solvent/prime. Also I need to pick an interior paint color so I can order the paint and get the spray equipment in order.

20120624-024735.jpg

Finish Kit Arrives

June 12, 2012

A big box from Vans arrived today. In it was the finish kit for the RV-7. This last subkit contains a lot of the more interesting pieces yklike the canopy, cowling, engine mount, landing gear, wheels, etc. I didn’t snap many pictures as my friend p dub and I spent the afternoon unpacking stuff and checking inventory. Here’s some general picks before calling is a night.

20120612-001101.jpg

20120612-001118.jpg

20120612-001232.jpg

20120612-002111.jpg

Mounting the Flap Motor

June 3, 2012

Friday evening I drilled and installed the nutplates for the mid span mounting block that anchors the flap actuator.

WARNING:Earlier in the plans Vans gives you the option the run the baggage floor above or below the aft seat floor. I choose to run them above. Well… When you install the forward nutplate for the block in this config, you have a stack of two layers (the 705 flange and the aft seat floor sandwiched between the baggage rib and the baggage floor. This created a gap that makes for a poor rivet as I have proven here. I think it’s ok but probably should have shimmed it for better fit.

Saturday was off and on work to mount the flap actuator motor. It mounts the the 766A channel using a thick doubler on the flange and and even thicker anchor made out of angle. The trick is to drill everything but the angle rivet holes. Then assemble it all including hooking up the jackscrew to the flap actuator arm. Once it’s all together you back drill the angle using the prepunched holes in the 766A channel.

I finished some random drilling for nut plates. Next up will be finishing the forward covers.

20120603-110441.jpg

20120603-110505.jpg

20120603-110514.jpg

20120603-110525.jpg

More Seats and Flaps

May 31, 2012

Slowly the cabin is taking shape. After returning from a cabin in the woods I worked on the cabin in the garage. The seat back hinges were finally riveted to the aft seat pans. Then the seat pans were installed permanently to the center section ribs. Tonight I made all the hinge pins for each of the seats. Two for the bottom of each seat back and one each for the seat back braces.

Up next was the mid-cabin flap actuator brace. It was trimmed to size and drilled for the mounting bolts. A notch was also cut into the baggage tunnel cover where the brace block is installed so you can take the tunnel cover off without having to unmount to the flap hardware.

Cabin Progress Photos

May 21, 2012

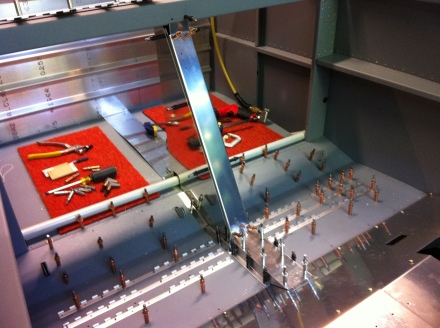
I had taken some pictures of the interior as I’ve progressed the last couple of weeks but I couldn’t locate them till tonight. So instead of recreating a bunch of posts I should have been writing all along, I’ll just dump them in one post with some descriptions.

Image

The seatback frames waiting for the reinforcement angle and the upper hinge to be added.

Image

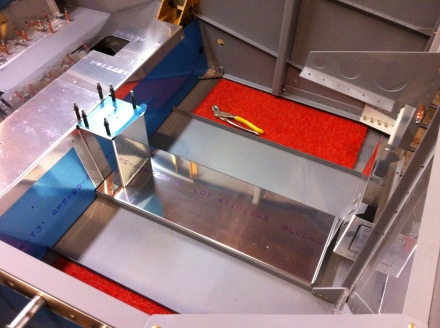
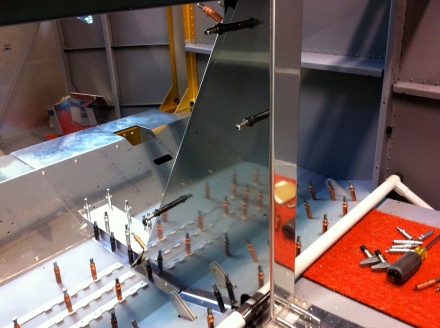
The forward covers and valve bracket cleco’d together to check fit.

Image

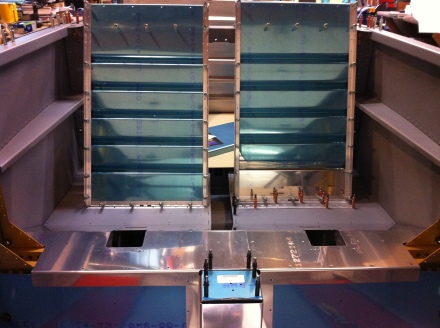
Back to the front seats with upper angle and hinge drilled.

Image

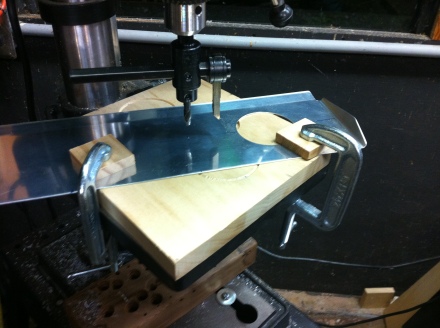
The seatback rear mounts get lightening holes. I screwed up the first part so I ordered this fly cutter which did the trick.

Image

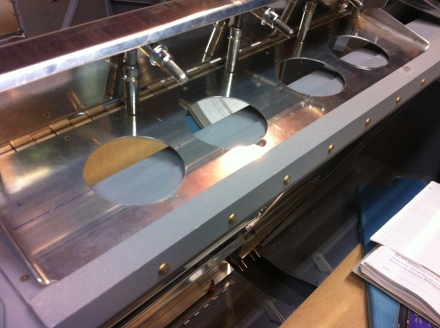
Here’s the left rear seat mount all done.

Image

The flap motor is hidden in this center triangle.

Image

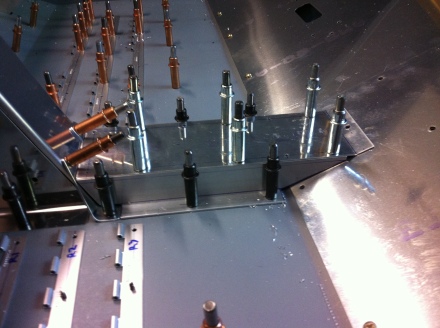
Here is the center tunnel cover.

Image

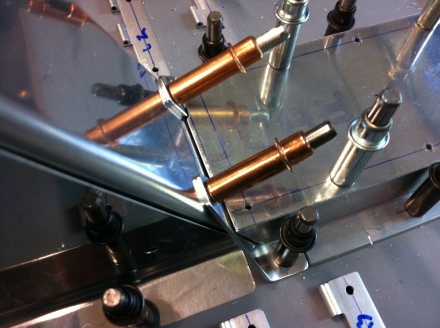
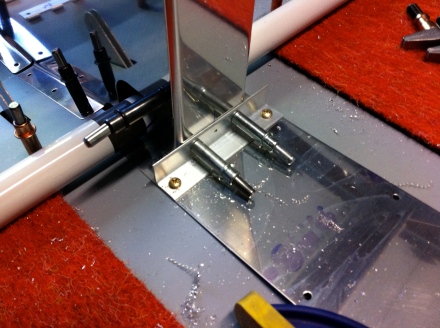
The intersection of the center tunnel cover and the flap actuator channel.

Image

Another view.

Image

The rear brace screws into the floor,

Image

The flap actuator channel mounted to the 705 bulkhead.

More Interior Work

May 21, 2012

The last two weeks have been dedicated to fabricating and finishing all the cabin parts. I had planned in priming today but the weather wasn’t cooperating. No biggie though as there is still lots of parts I can prep ahead of priming.

  • The seats are drilled to final size.
  • The forward seat covers are drilled and prepped.
  • The front spar covers are done including the PITA angles that get drilled to the outboard doublers (pics attached).
  • The center tunnel cover between the seats is drilled and waiting to be primed and riveted.
  • The flap motor attach channels are mostly fabricated; a few holes are left to drill.
  • Starting to drill the Center floor cover and heat baffle.

20120520-200539.jpg

To drill the angles that the outboard cover attaches, I clamped some scrap angle to create a reference line.

20120520-200551.jpg

Be sure to use some scrap wood on other side of clamp or risk a dented skin.

20120520-200613.jpg

With the reference line established you can drill the angle in assembly.

20120520-200638.jpg

The plans give you the upper and lower marks and a mid line drawn on the angle provides the vertical reference.

20120520-200646.jpg

Drill the cover and angle to #40 in assembly. Then remove from fuselage to expand to #19 and drill the angle for the nutplates.

Seat Week 2

May 7, 2012

The joys of seat making continue. The angle is drilled on to the seat back and all the components have been cut from raw stock.

I might have a solution for riveting the hinges to the aft seat floor. Hopefully I can borrow a c-frame with Cleveland Tools’ backrivet set up from another local builder.

In the meantime I am continuing to knock out all the parts in prep for a massive primer session so I can finish out the fuse in prep for finish kit arrival in early June.

20120503-014357.jpg

20120503-014413.jpg

Seat Week

May 1, 2012

Methodically getting all the seat back pieces cut and prepped to drill. These are mostly formed from raw stock so nothing is prepunched. I mangled a seat back brace last night attempting to drill lightening holes with a 2.25 inch hole saw meant for wood. Luckily, I didn’t loose any fingers when the drill press grabbed the part from me and spun it around. Ordered new part along with lighting package from ?


No pictures tonight so I’ll take extra tomorrow.