Archive for the ‘Center section’ Category
August 29, 2011

For your viewing pleasure here’s the boys enjoying the Blues over Lake Washington earlier this month. As for the project, i’ve been working on it I swear. It’s really just a 1000 little tasks without much visual payoff so I’ll spare you the pics of pretty countersunk holes in a neat little row.
I’m still slowly working through all the final steps before starting the riveting on the main fuse. I’m excited to see if I got a the puzzle pieces made correctly! All the deburring, dimpling, and countersinking including the longerons is done on the internal structures. I’ve primed about 2/3 of these parts. The left forward fuse pieces still need to be etched and primed. The skins still need to be prepped but that should be kinda fun as imam trying to “eat my vegetables”‘first. Also, I have to go back and find a solution for one hole I doubled drilled on a bulkhead. After that I’ll be reassembling the canoe! Work is going to take over this week so hopefully I can hit it hard next weekend. I’m aiming to flip the canoe this fall and order finish kit before the end of the year.
Tags:assemble, countersink, debur, dimple, drill
Posted in Bulkheads, Center section, Firewall, Forward Fuse, Fuse, Longerons | Leave a Comment »
May 8, 2011

Where to start? This should be more like 3 or 4 posts but I’ve been busy with work and family so I haven’t been updating the blog like I should. So here it goes. After finishing the center section riveting, I drilled the 715 ribs on each side as well as all the floors.

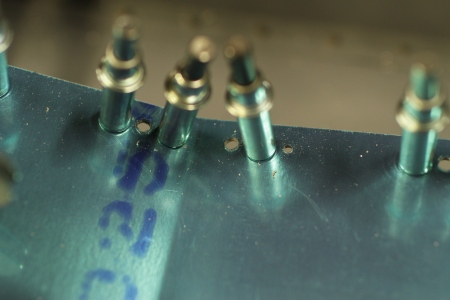
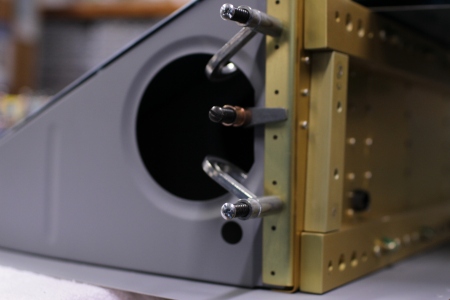

The center section then got flipped back over and reattached to the 706 bulkhead. Attaching the 770 side skins was very challenging. I had a hard time getting the holes to match up. It took three days of searching the forums and builder sites for advice to arrive at the solution. You have to basically raise the rear fuse just behind the 706 bulkhead by a good 8 inches. This spreads the longerons a bit and gets those rear holes in the 770 skin close enough to the aft fuselage holes that you can get some clecoes inserted.
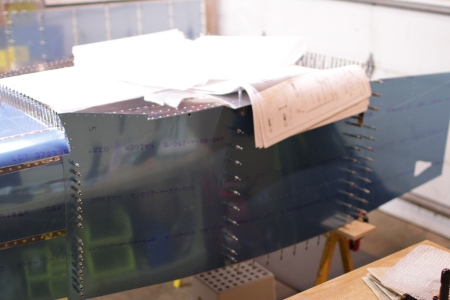
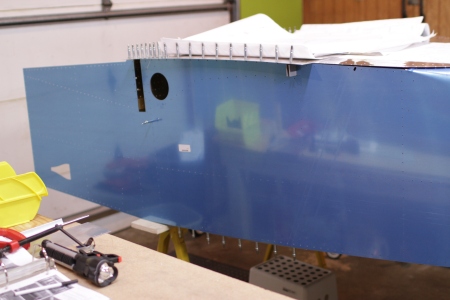

After that it was time to match drill the arm rests. Pretty straight forward.
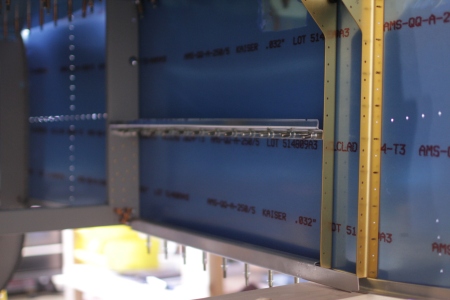
The next hurdle is bending the bottom rear of the 770 skins to conform to the curve of the aft fuse. My first attempt ended with a small crack at the 90 degree bend because I used the steel from my mini-brake and it has a very sharp edge. Joe at Van’s said I could stop drill it and glue in a metal backing but I opted just to order a new skin for $60.
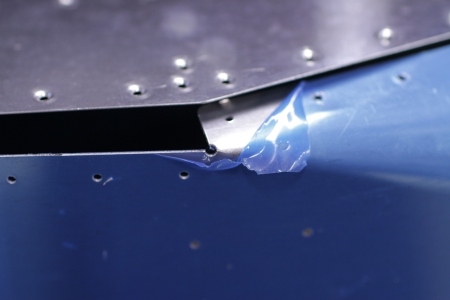
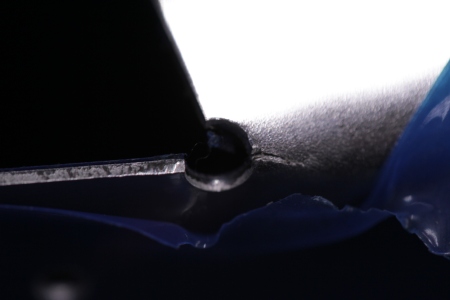

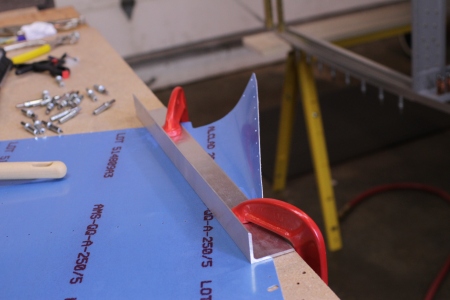
On the second attempt I used a piece of scrap angle that had a slightly rounded edge. This time the bend turned out better but I still ended up with a tiny little crack again. I will just drill and open up that corner a bit to get rid of the crack and help the edges meet better. On the third try with the left skin, I rounded the edge of the angle even more and the bend turned out perfect. I’m very satisfied to have the 770 skins in place and those corners fitted. Next up will be drilling all the holes in the longerons. Yay!


Tags:715, 770, armrest, cleco, drill, fit, mistake, skin
Posted in Center section, Fuse | Leave a Comment »
April 20, 2011

At the risk of offending the neighbors Paul came over last night for an evening of riveting. We made pretty quick work of the rest of the center section skin rivets so I can move on to assembling the rest of the fuselage.
I ended up dodging the neighbors phone call, but we did manage to piss off my three year old who told mommy to “make the noise stop!” Oh well I hope you can forgive daddy Cam once you get to fly with me!
Tags:Center section, paul, rivet
Posted in Center section, Fuse | Leave a Comment »
April 10, 2011

Wow. I can’t believe it’s been almost a month since the last update. I had some work travel and late nights that ate into building time. Today, my friend Ryan came over to help on the center section riveting. This was his introduction to riveting although he’s been flying with me a number of times when I was still renting the Skyhawks and Cherokee. We finished all the seat ribs and the 705 bulkhead. No rivets needed to be drilled out and Ryan did great to avoid leaving any smiles in the skins. We had to leave the baggage rib riveting till next weekend.
I’ve also made contact with a local EAA Tech Counselor to come look over my progress later this month. Looking forward to having some expert eyes on my progress and correct any bad habits.

I’m also including some pics of notching the longeron because they were still on the camera when I downloaded today’s pics. The picture above shows the notch marked and the punch marks for drilling the radius holes.

Here’s the notch after drilling and roughing out the rest of the notch. After filing it was ready to go. The longerons are now in position waiting to receive the rest the of the fuselage pieces for final drilling.
Tags:Center section, rivet, Ryan
Posted in Center section, Fuse, Longerons | Leave a Comment »
March 15, 2011
No pics to post tonight, but a quick update of progress for the week. The longerons are now notched and in position on the fuselage assembly. Everything looks well aligned. I’ll know more when I get the side skins attached soon. I also went back and prepped the rudder cable egress in aft fuselage. The hex screw dimpler from Avery’s worked perfectly here. I also started collecting and roughing out the pieces for the forward fuselage assembly and misc. parts prep. This boring stuff will continue until I can get the center skin riveted.
Posted in Center section, Fuse, Longerons | Leave a Comment »
March 6, 2011

The fuselage is now so big that I have resorted to panoramas to show it in profile. The weather cooperated on Saturday, so I was able to prep and prime the 776 Center section skin. Paul, my trusted rivet partner, won’t be coming over till next week to help me rivet the skin to the skeleton. Instead I concentrated on a number of lingering little tasks. I lightly ran the countersink over the dimpled holes on the bottom of the 704 bulkheads. I primed the 2 spacer tubes and all the bare aluminum on the 704 that had lost its alodine coating. My biggest task was to figure out what to do with a poorly set rivet in the seat rib/705/baggage rib interface. The centermost ribs are the most problematic. Chad H. is a few months ahead of me in his build (and he only started a year ago!) warned me of his frustration get rivets set in there. Drilling out this rivet is a real pain. I had to do it backwards and drill out the shop head. Here goes nothin…

And of course I screwed it up. The hole got elongated pretty good. I ended up drilling out for an AN3 bolt as shown in the pic above. The edge distance is pretty tight but I think it’s barely in spec. I’ll point this repair out in my tech counselor visit just to be sure.

Those longerons I made many moons ago are about to be assembled into the fuselage. Ahead of that I need to notch them. Two big bars of aluminum stick out here. The horizontal stabilizer will get attached to the bars. Overall I made pretty good progress this weekend. Lots of big pieces getting put in place quickly.
Tags:704, 705, Center section, longeron, mistake, repair
Posted in Center section, Fuse, Longerons | Leave a Comment »
February 28, 2011

The final assembly of the center section took a few steps forward this weekend. The seat ribs/705/baggage ribs interface is now riveted. The central ribs were very challenging to squeeze. In fact, I have one questionable rivet that might need to be drilled out. The nutplates for the seat ribs were installed as well. The only thing holding me up is etching and priming the 776 skin before riveting it to the skeleton. The weather wasn’t going to cooperate today to do that, so I decided to work on other details in the shop.

Here’s a view down the center two seat ribs looking at the 705 bulkhead. The top rivets on each vertical row (the skeleton is sitting upside down so its the bottom rivets in this photo) were the difficult ones.

This is a detail of the 705 bulkhead with seat ribs and baggage ribs attached.

The center section is wider than the sawhorse plus I wanted a larger, softer surface for the whole fuselage to rest on upside down. In preparation for attaching the center section to the aft fuselage, I made some wood spans for the stock metal sawhorses I’ve been using.

Another detail I need to prep are the slots in the bulkheads that the longerons slip into. I should have done this when I was prepping the bulkheads but I missed it. I just need to run a file over them to open up enough to have the longeron angle slide in without forcing it.
Tags:705, 706, baggage ribs, rivet, seat ribs
Posted in Center section, Fuse | Leave a Comment »
February 23, 2011
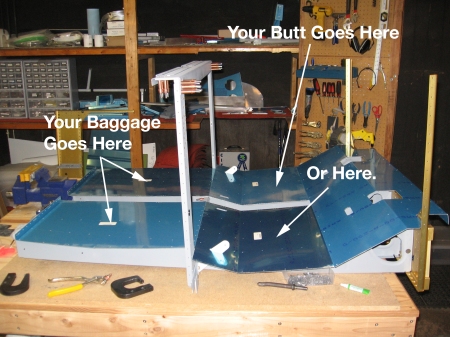
Tonight I didn’t have time to do much more than test out how to rivet the ribs to the 705 bulkhead and fit the floor panels together. If you’re the type of person that loves a good mystery or wants your stories to slowly reveal themselves then I urge you to stop reading now…
Ok for the rest of you that stayed, here’s a cheat sheet to what exactly the center section is relative to your anatomy. Enjoy!
Tags:704, 705, Center section, floor panels, seat ribs
Posted in Center section, Fuse | Leave a Comment »
February 21, 2011
Here’s a quick project update sans pictures. We headed to the Cascades for Friday and Saturday nights hoping to find some good sledding for the boys. Surprising we didn’t really find good snow, but we had a grand time none-the-less.
Obviously not a lot could get done on the project. I did manage to arrange for a another visit from Paul to help me with riveting the 716 ribs to the aft spar bulkhead. We did nave to drill out one rivet. I started attaching the 705 bulkhead to the back of the seat ribs.
Posted in Center section, Fuse | Leave a Comment »
February 16, 2011

The 2011 resolution is to put in at least one hour a day. So tonight even though I’m waiting on some riveting help with the ribs, I did keep inching forward.

The control column access plates are simple two piece units with a nut plate on the flange for the floor attachment.

I also played around with how to jig up the 704 bulkhead so we can set those -4 rivets and not mar up the ribs or bulkhead web.
Posted in Center section, Fuse | Leave a Comment »


